Basics of Microsoft Word
Assuming you have Microsoft Office 2010 installed in your PC, to start word application, follow the following steps at your PC:
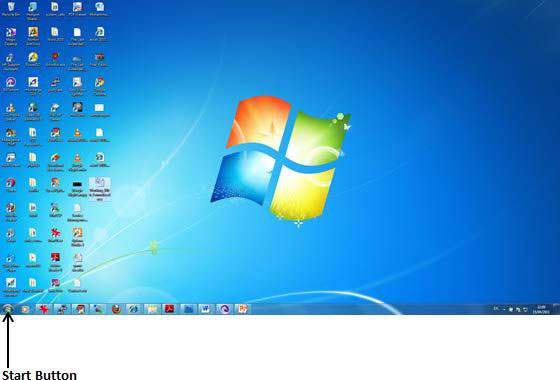
Step1: Click Start button.
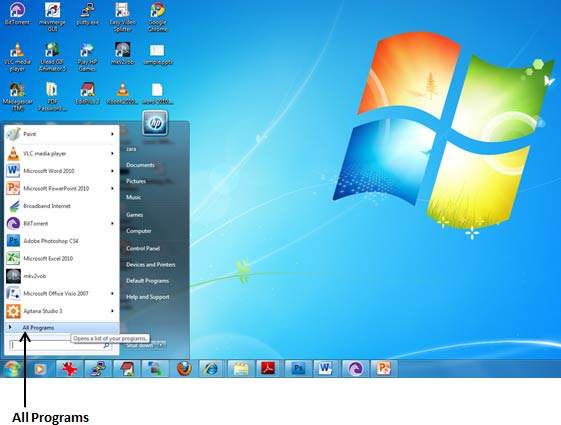
Step2: Click All Programs option from the menu.
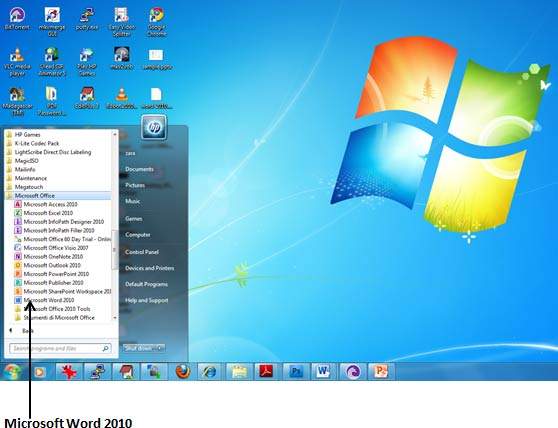
Step3: Search for Microsoft Office from the sub menu and click it.

Step4: Search for Microsoft Word 2010 from the submenu and click it.
This will launch Microsoft Word 2010 application and you will see the following word window.
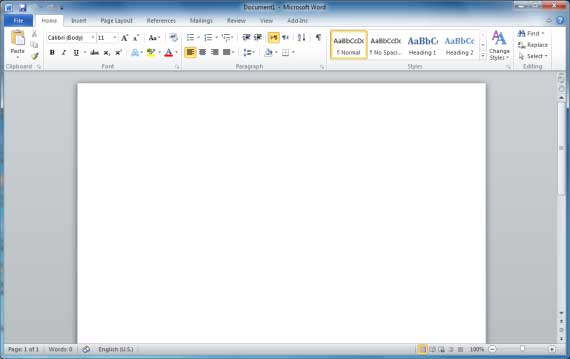
Following is the basic window which you get when you start word application. Let us understand various important parts of this window.
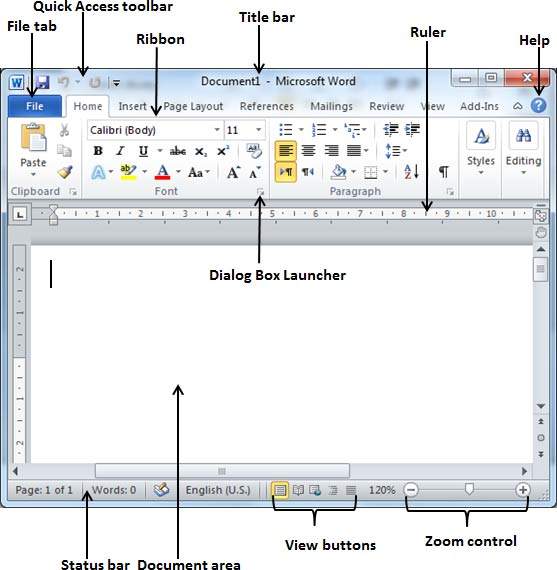
File Tab
It is the place to come when you need to open or save files, create new documents, print a document, and do other file-related operations.

| Option | Description |
|---|---|
| Save | If an existing document is opened, it would be saved as is, otherwise it will display a dialogue box asking for document name. |
| Save As | A dialogue box will be displayed asking for document name and document type, by default it will save in word 2010 format with extension .docx |
| Open | This option will be used to open an existing word document. |
| Close | This option will be used to close an opened document. |
| Info | This option will display information about the opened document. |
| Recent | This option will list down all the recently opened documents |
| New | This option will be used to open a new document. |
| This option will be used to print an opened document. | |
| Save & Send | This option will save an opened document and will display options to send the document using email etc. |
| Help | You can use this option to get required help about word 2010. |
| Options | Use this option to set various option related to word 2010. |
| Exit | Use this option to close the document and exit. |
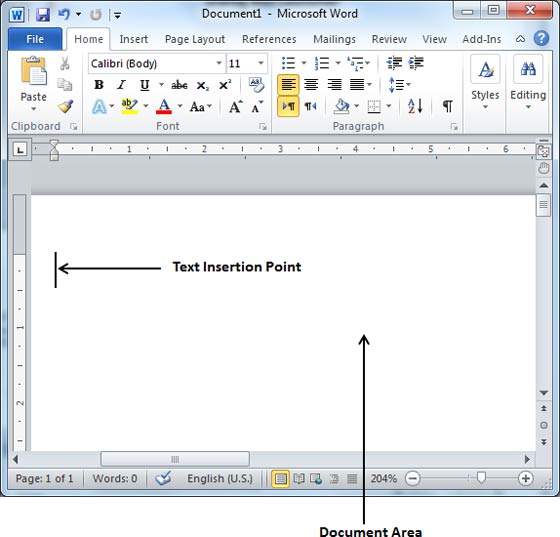
Document Area
The area where you type. The flashing vertical bar is called the insertion point and it represents the location where text will appear when you type.
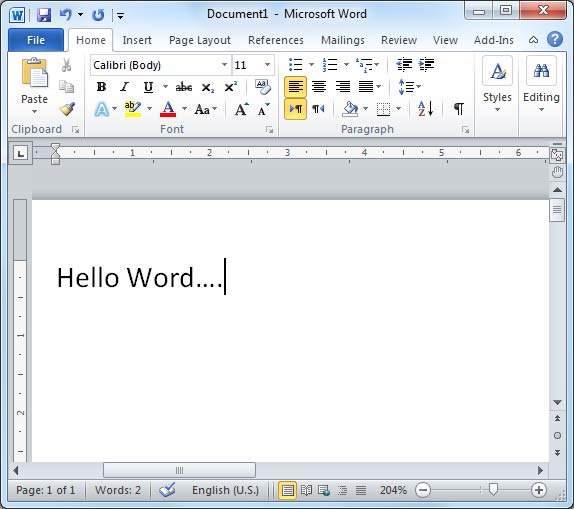

Saving a Document
You have to save the document to avoid losing work you have done on a Word document.
Step1: Click the File tab and select Save As option.
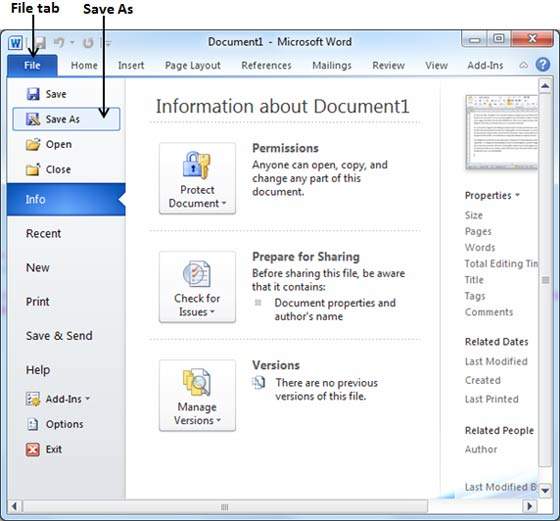
Step2: Select a folder where you would like to save the document, Enter file name which you want to give to your document and Select a Save as type, by default it is .docx format.
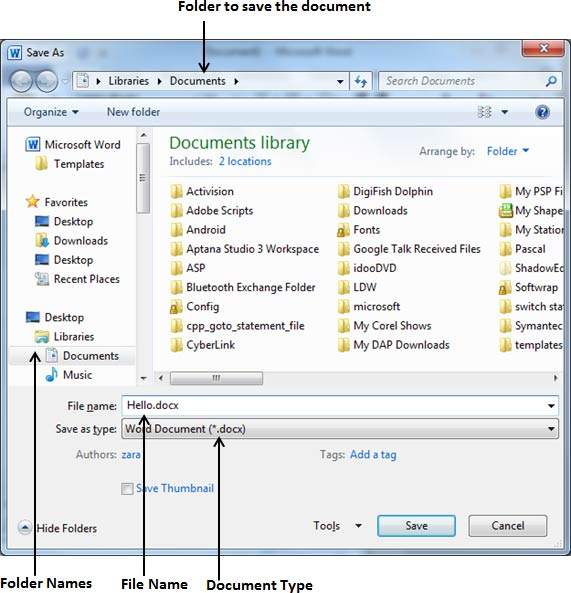
Step3: Finally, click on Save button and your document will be saved with the entered name in the selected folder.
Copy & Paste Operations
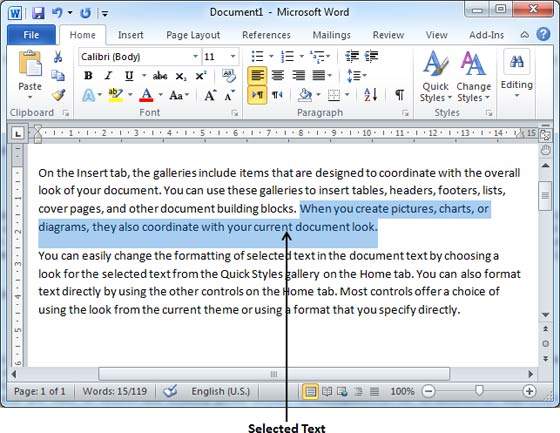
Copy operation will just copy the content from its original place and create a duplicate copy of the content at the desired location without deleting the text from it's the original location.
Step1: Select a portion of the text using any of the text selection methods.
Step2: At second step, you have various options available to copy the selected text in clipboard. Just use any one of them which you like most:
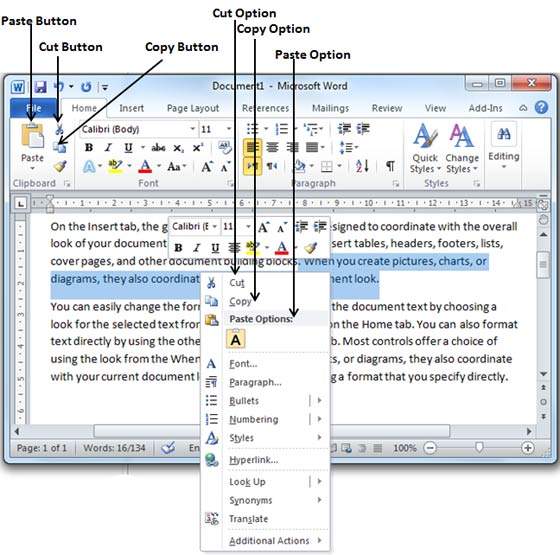
Step3: Finally click at the place where you want to copy selected text and use either of these two simple options:
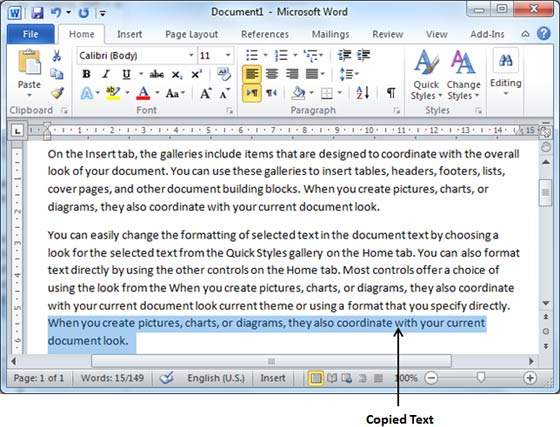
Note: You can repeat paste operation as many times as you like to paste the same content.
Changing the font style and size
Let me give a brief idea about font buttons. Here is a screen capture to show you few font related buttons.
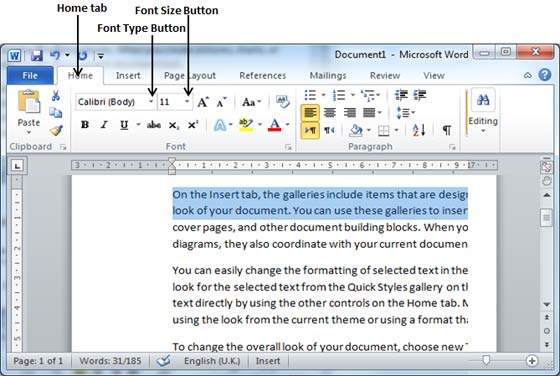
Step1: Select the text that you want to change to a different font and click Home tab. Now click Font Type button to list down all the fonts available as shown below.

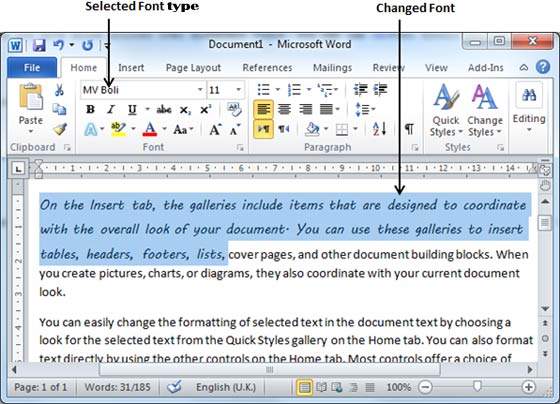
Step2: Try to move mouse pointer over different fonts listed. You will see that text font changes when you move mouse pointer over different fonts. You can use Font Scroll Bar to display more fonts available. Finally select a desired font by clicking over the font name in the list. I selected MV Boli for my sample text.
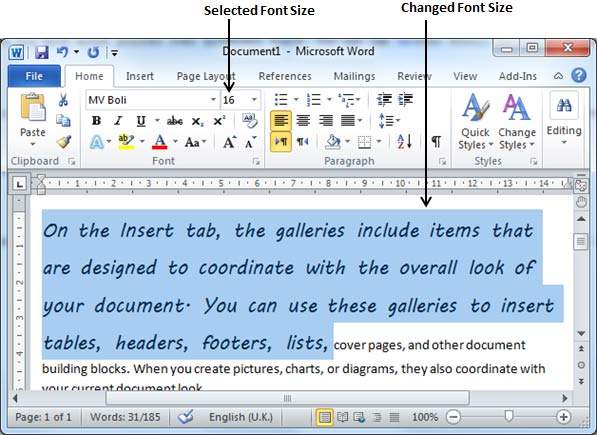
Step3: Similar way, to change the font size, click over the Font Size button which will display a font size list. You will use same procedure to select a desired font size what you have used while selecting a font type.
You can use a quick way to reduce or enlarge the font size. As shown in first screen capture, Shrink Font button can be used to reduce the font size whereas Grow Font button can be used to enlarge font size.
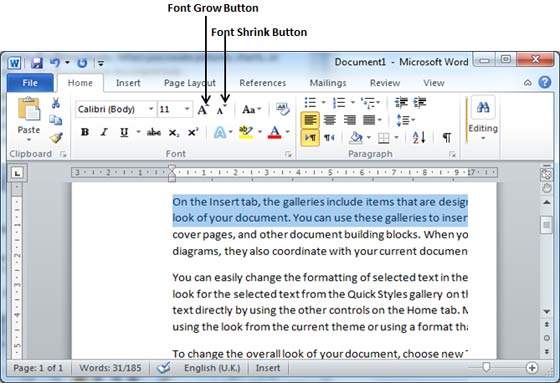
Try to click either of these two buttons and you will see the effect. You can click a single button multiple times to apply the effect. Each time you click either of the buttons, it will enlarge or reduce the font size by 1 point.
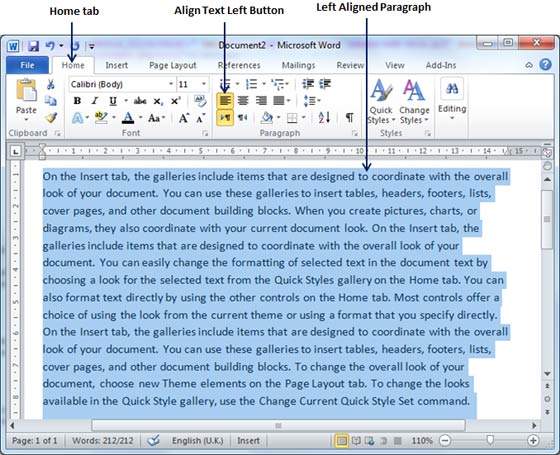
Text Alignment
You can change the alignment of text by selecting the text or images and click the alignment tools. For example
The left alignment of the text is shown below.
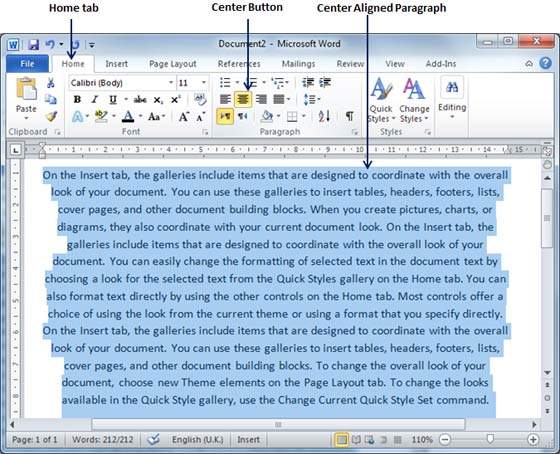
The center alignment of text is shown below.
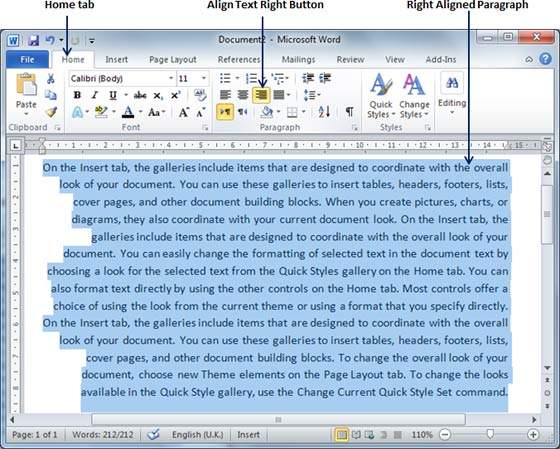
The right alignment of the text is shown below.
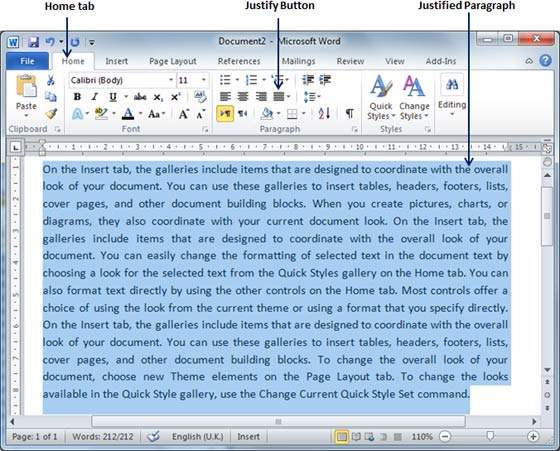
The justified alignment text is shown below
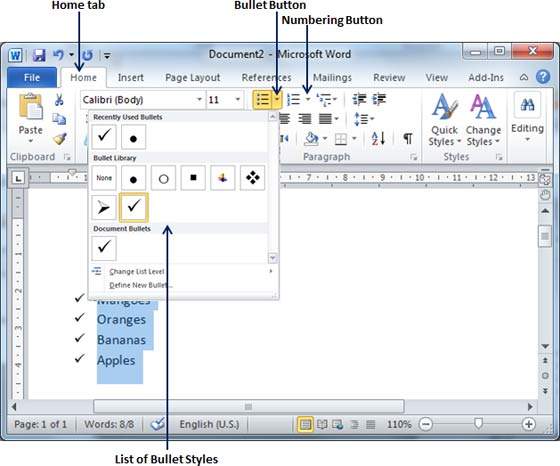
Bullets
This is very simple to convert a list of lines into a bulleted or numbered list. Following are the simple steps to create either bulleted list or numbered list.
Step1: Select a list of text to which you want to assign bullets or numbers. You can use any of the text selection method to select the text.
Step2: Click the Bullet Button triangle to display a list of bullets you want to assign to the list. You can select any of the bullet style available by simply clicking over it.
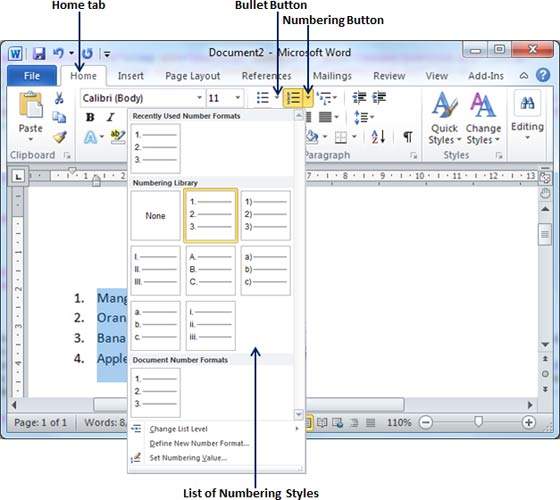
Step3: If you are willing to create a list with numbers then click the Numbering Button triangle instead of bullet button to display a list of numbers you want to assign to the list. You can select any of the numbering style available by simply clicking over it.
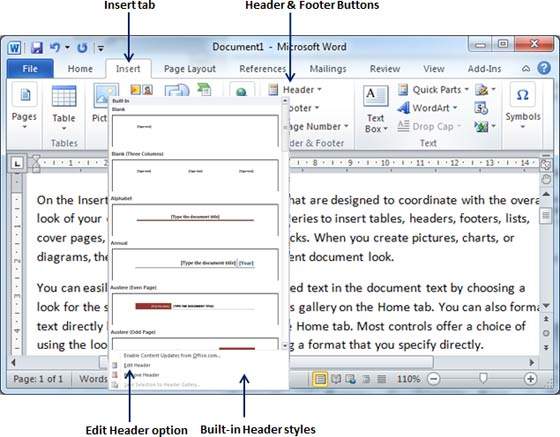
Header and footer
Following are the simple steps to add header and footer in a word document.
Step1: Click the Insert tab, and click either Header button or Footer button whatever you want to add first. Assume you are going to add Header, so when you click Header button it will display a list of built-in Headers from where you can choose any of the headers by simply clicking on it.
Step2: Once you select any of the headers, it will be applied to the document in editable mode and the text in your document will appear dimmed,Header and Footer buttons appear on the Ribbon and a Close Header and Footer button will also appear at the top-right corner.
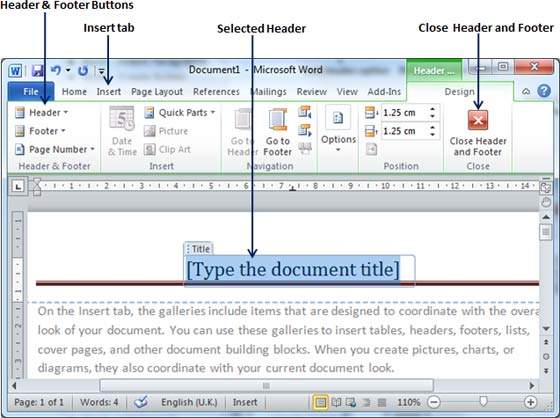
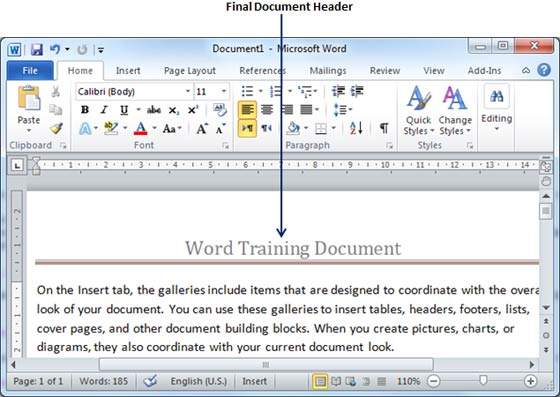
Step3: Finally you can type your information whatever you want to have in your document header and once you are done, click Close Header and Footerto come out of header insertion mode. You will see final result as follows.
You can follow a similar procedure to add footer in your document.
Page Numbers
Following are the simple steps to add page numbers in a word document.
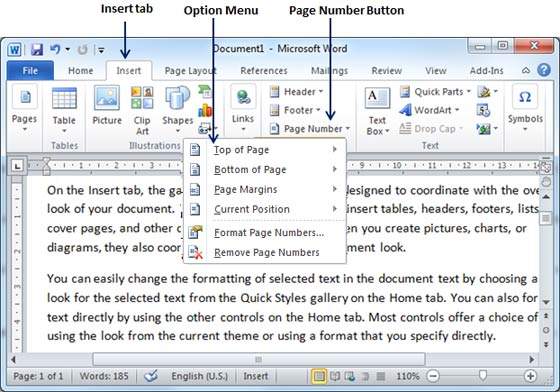
Step1: Click the Insert tab, and click Page Number button available in header and footer section. This will display a list of options to display page number at the top, bottom, current position etc.
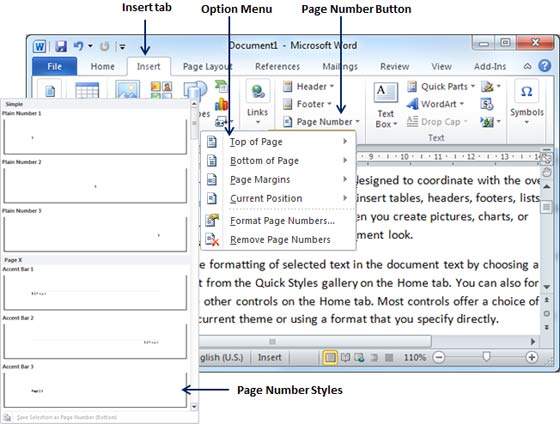
Step2: When you move your mouse pointer over the available options, it displays further styles of page numbers to be displayed. .
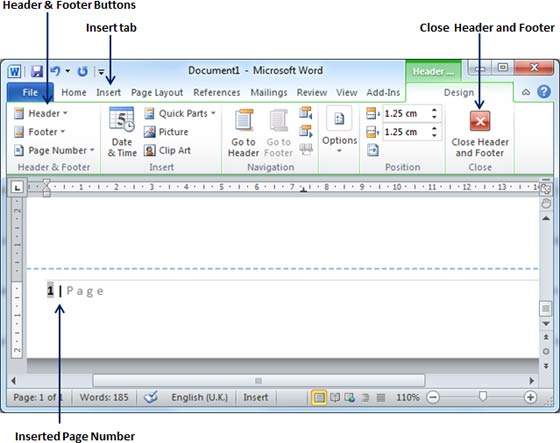
Step3: Finally select of the page number styles which you like most. I selected Accent Bar 1 style by clicking over it. After this step you will enter in Page Footer modification mode.
Table
Following are the simple steps to create a table in a word document.
Step1: Click the Insert tab, and click Table button. This will display a simple grid shown below. When you move your mouse over the grid cells, it makes a table in the table which appears in the document. You can make your table having desired number of rows and columns.
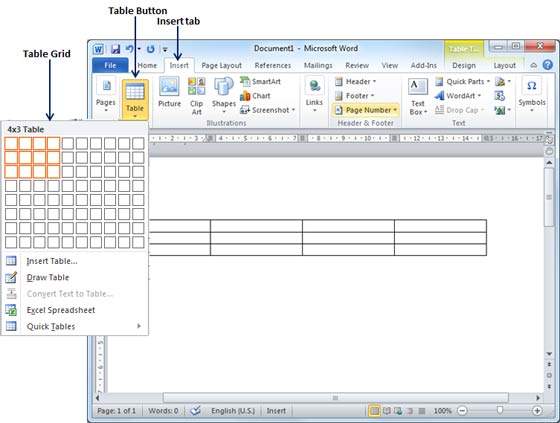
Step2: Click the square representing the lower-right corner of your table, which will create a actual table in your document and word goes in table design mode giving lots of options to work with table as shown below.
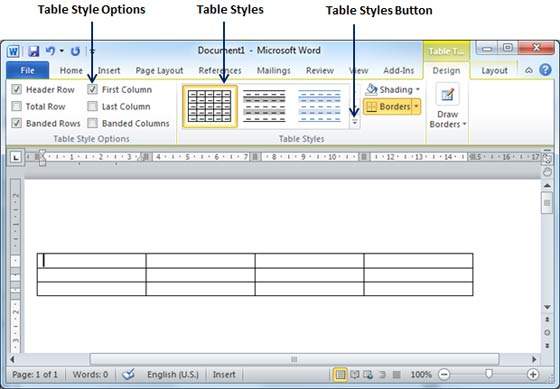
Step3: This is the optional step if you want to have fancy table. Click Table Styles button to display a gallery of table styles. When you move your mouse over any of the styles, it shows real time preview of your actual table.
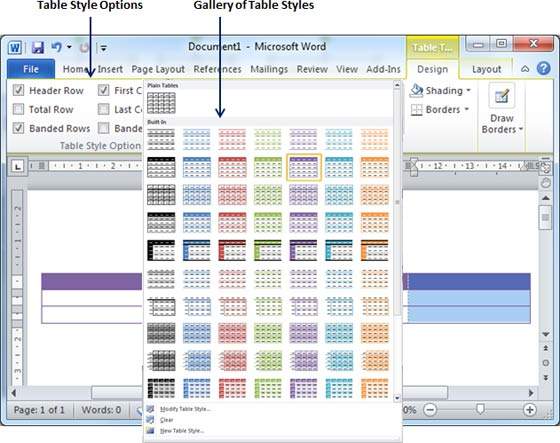
Step4: To select any of the styles, just click over the built-in table style and you will see that selected style has been applied on your table.

Adding Formulae
Following are the simple steps to add formula in a table cell available in word document.
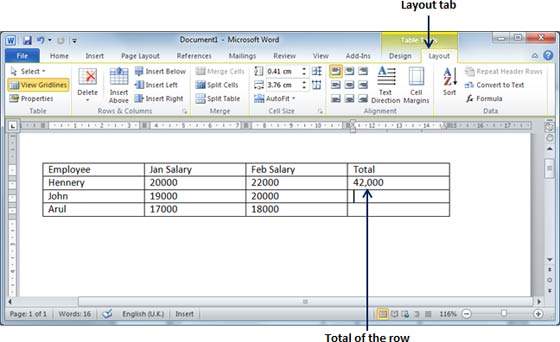
Step1: Consider the following table where we will have total of the rows. Click in a cell that should contain the sum of a rows.
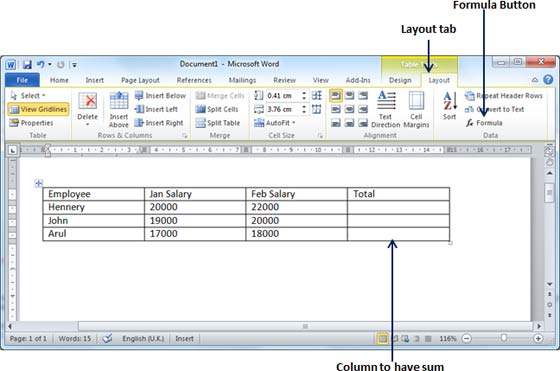
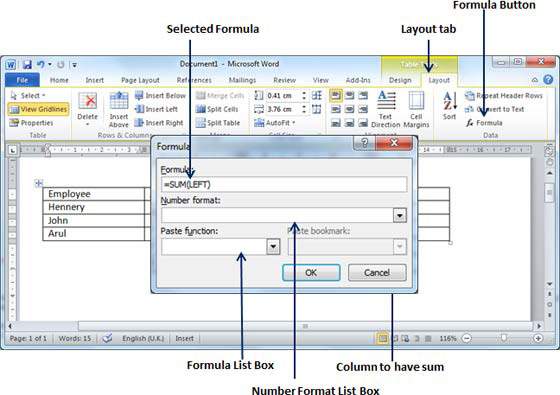
Step2: Now click the Layout tab and then click Formula button which will display a Formula Dialog Box which will suggest a default formula, which is=SUM(LEFT) in our case. You can select a number format using Number Format List Box to display the result or you can change the formula using Formula List Box.
Step3: Now click OK to apply the formula and you will see that left cells have been added and its sum has been put in the total cell where we wanted to have it. You can repeat the procedure to have sum of other two rows as well.
List of Formulae
| Formula | Description |
|---|---|
| AVERAGE( ) | The average of a list of cells. |
| COUNT( ) | The number of items in a list of cells |
| MAX( ) | The largest value in a list of cells |
| MIN( ) | The smallest value in a list of cells |
| PRODUCT( ) | The multiplication of a list of cells |
| SUM( ) | The sum of a list of cells |
List of Shortcuts
| Key Combination | Description |
|---|---|
| Ctrl + C | Copy the selected content |
| Ctrl + X | Cut the selected content |
| Ctrl + V | Paste the content copied or cutted |
| Ctrl + Z | Undo the last action |
| Ctrl + Y | Redo the last action performed |
| Shift + Side Arrows | To select the text |
| Ctrl + shift + < | Decreases the font size |
| Ctrl + shift + > | Increases the font size |
| Ctrl + B | Change the selected text to bold |
| Ctrl + I | Change the selected text to Italic |
| Ctrl + A | Selects the whole content of the page |
| Ctrl + P | Prints the document |
| Ctrl + U | Underlines the selected content |
| Ctrl + S | To save the document |
| Shift + F3 | Change the text from uppercase to lowercase or a capital letter at the beginning of every word. |
| Tab | Gives 5 spaces |
| F12 | Save As the document |
Hi, Great.. Tutorial is just awesome..It is really helpful for a newbie like me.. I am a regular follower of your blog. Really very informative post you shared here. Kindly keep blogging. If anyone wants to become a Front end developer learn from Javascript Training in Chennai . or learn thru Javascript Training in Chennai. Nowadays JavaScript has tons of job opportunities on various vertical industry. JavaScript Training in Chennai
ReplyDelete